Congratulations! You have been awarded and need help implementing the RoverPass badge of excellence for a specific category of Campground types. Now that you’ve won, let’s show you how to brag about it!
This post will explain to you how to put the badge of excellence on your website. Our recommendation is to introduce our program manager to your website person/s.
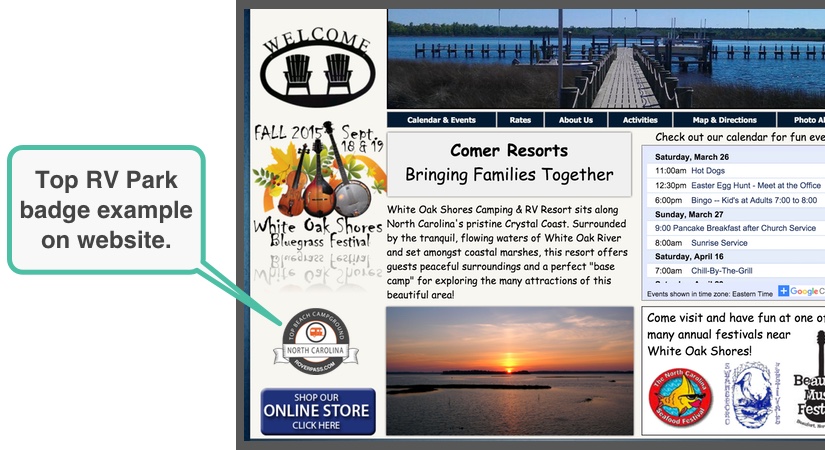
This is what the badge will look like once you are finished.
For WordPress Websites (most common):
Step 1 – Log into wordpress press site. You login URL will look something like this
Your website was built in wordpress – www.wordpress.com
Hosted on your website (www.wordpress.org) – www.roverpass.com/blog/wp-login
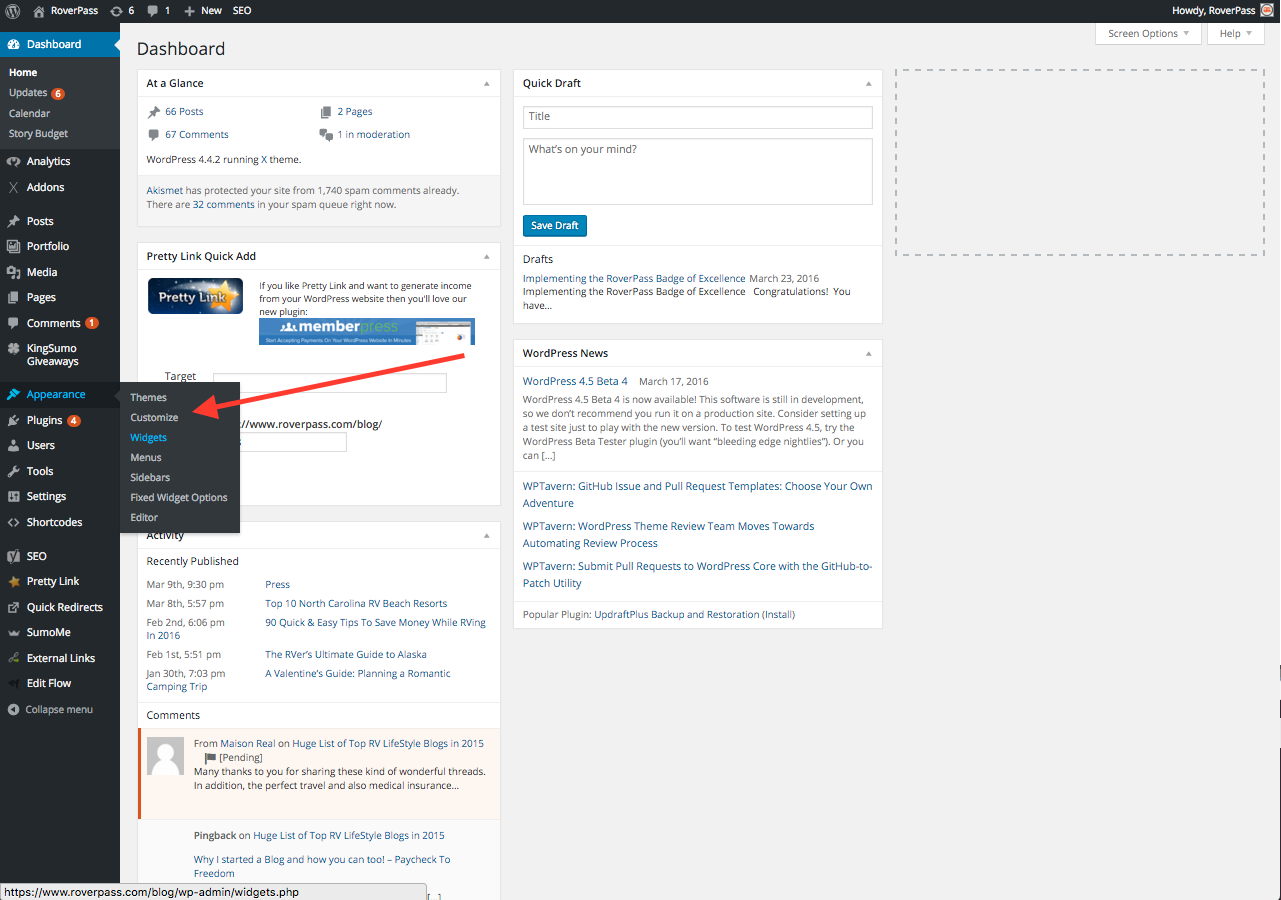
Step 2 – Once you are in, expand the the “Appearance” Tab and click “Customize.”
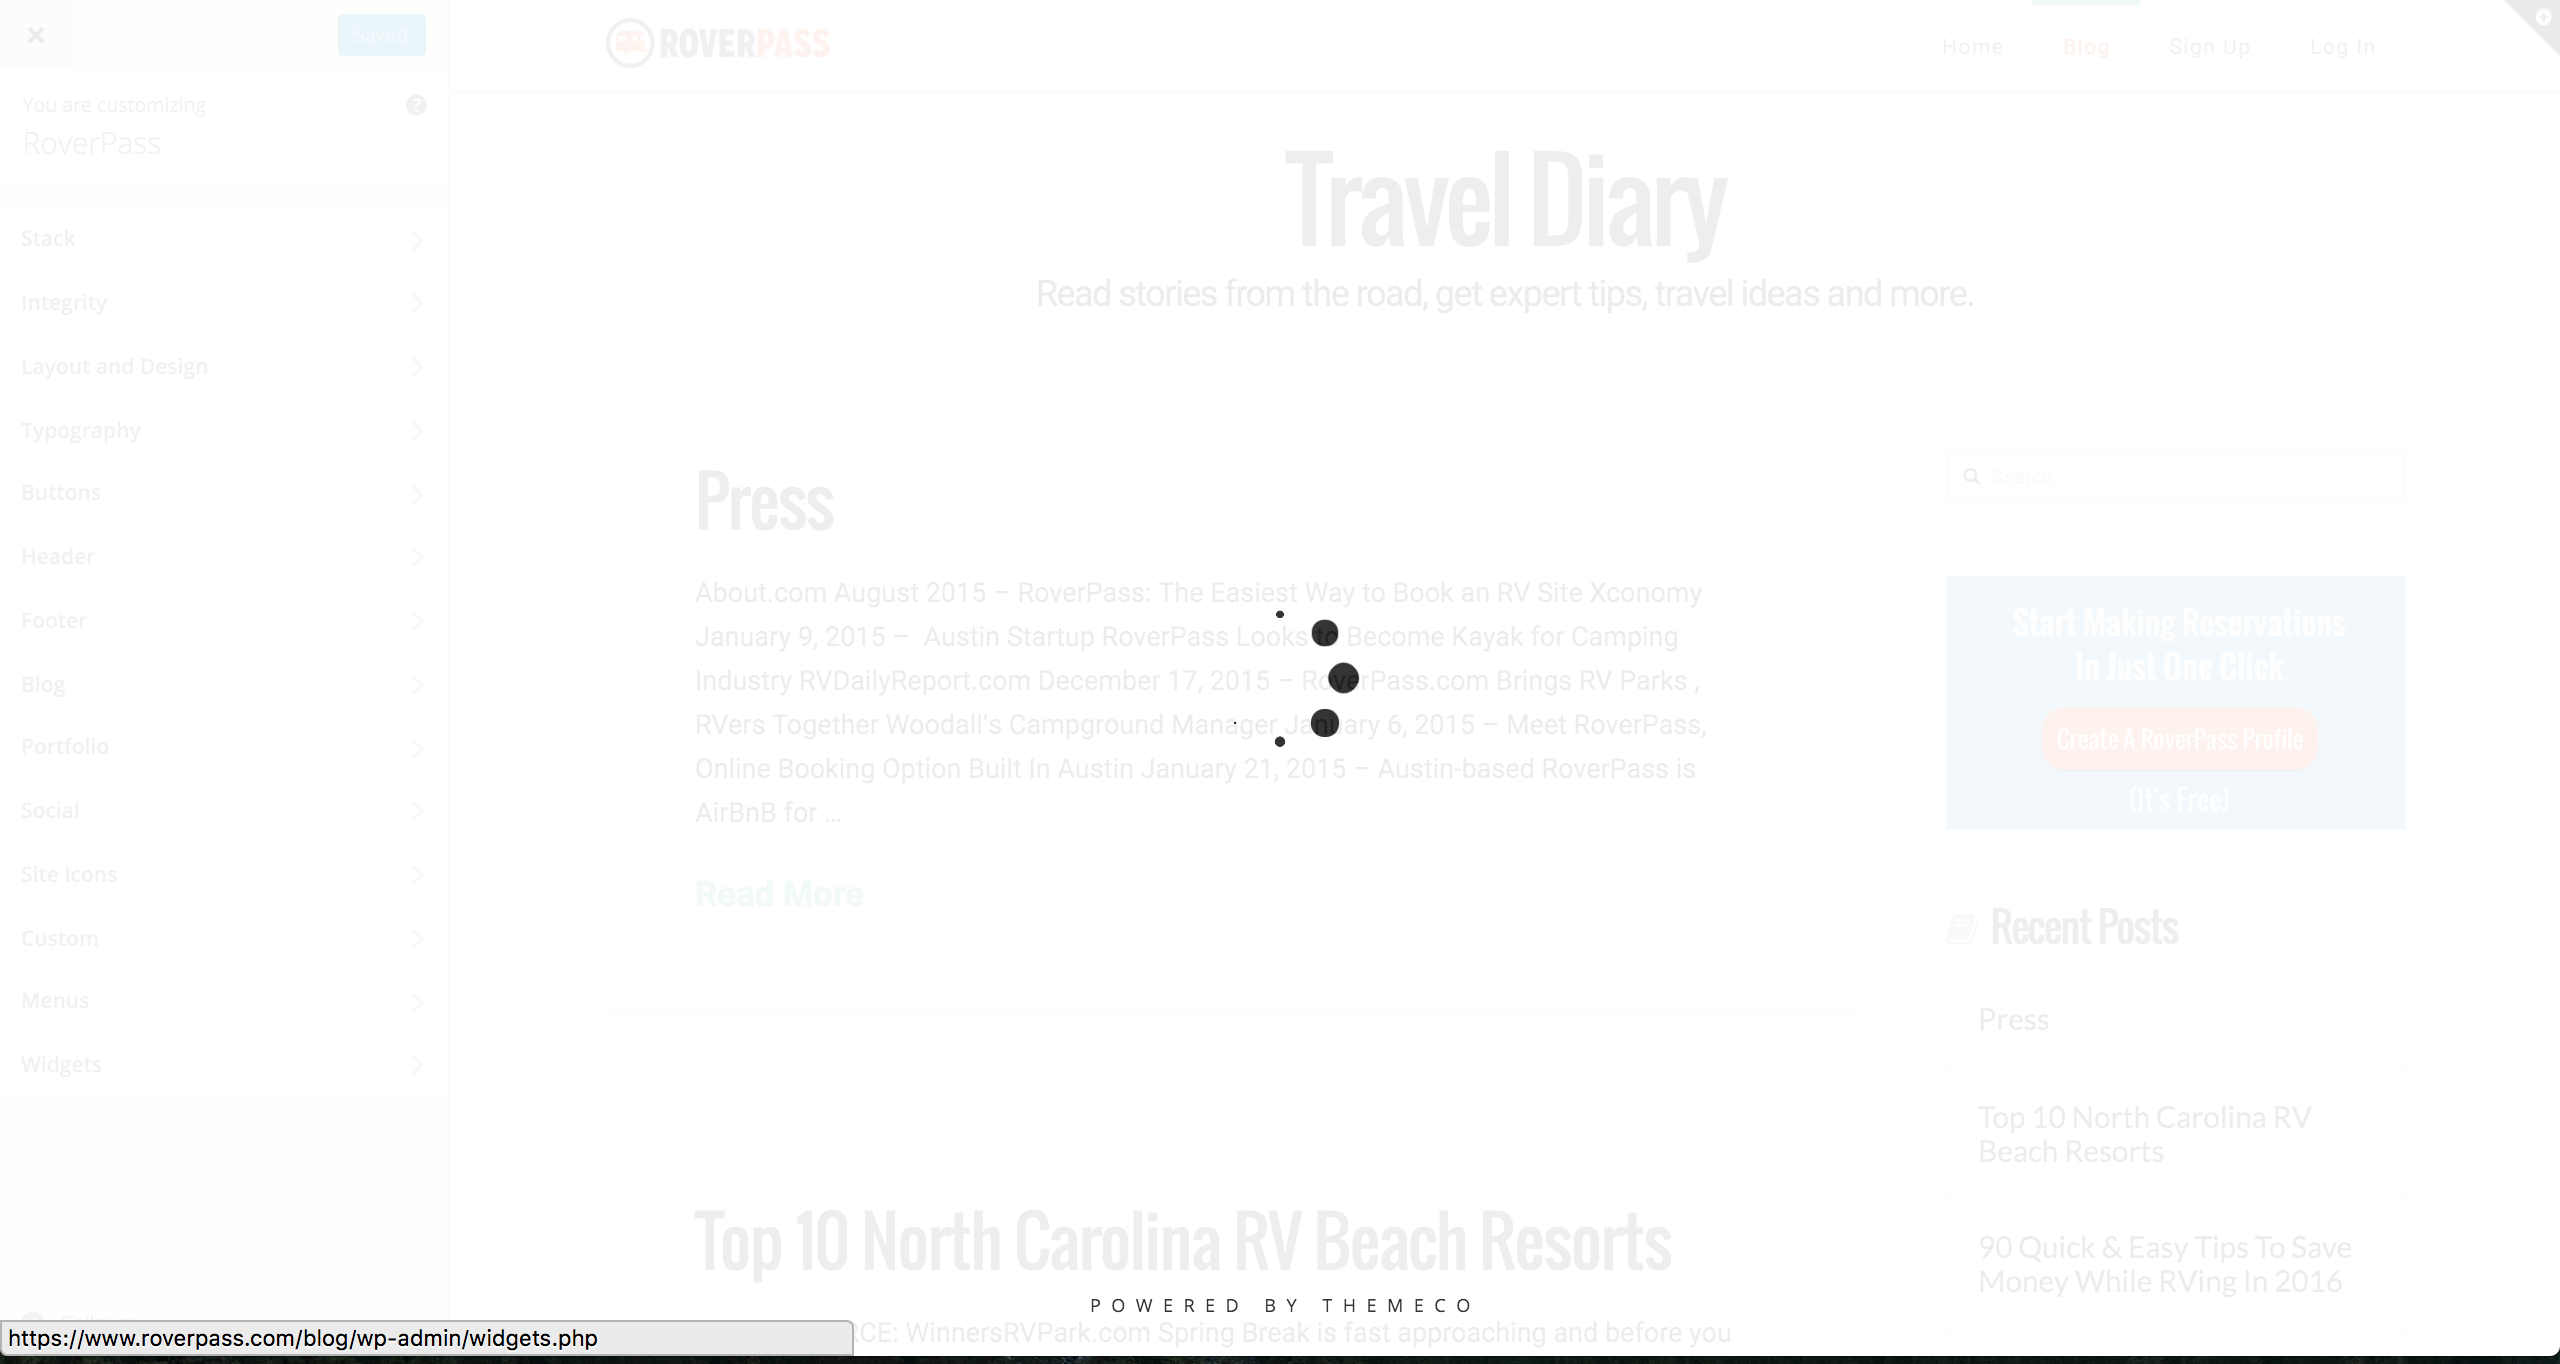
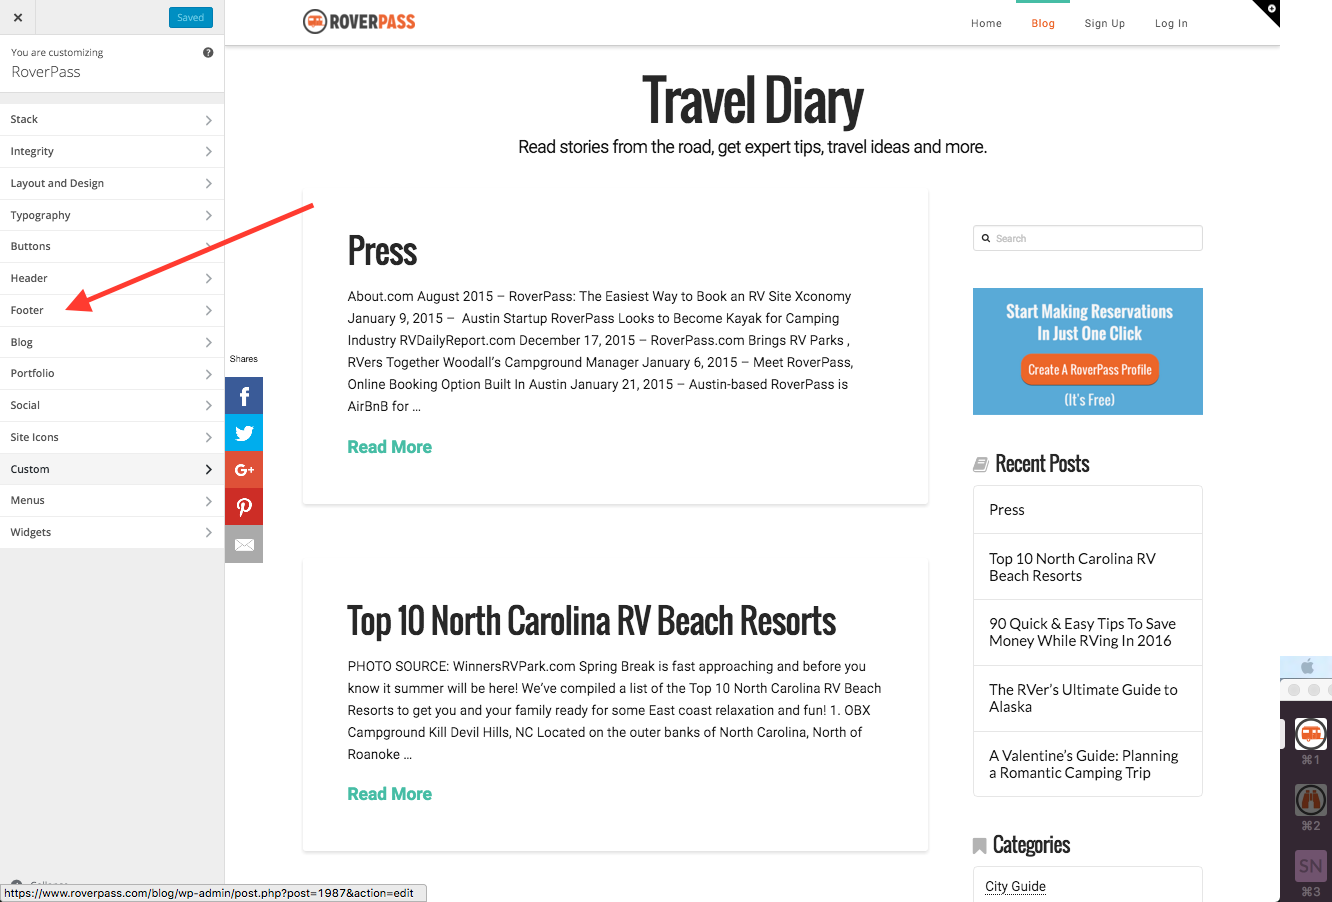
Step 3 – Once you click “Customize” you will see a screen like this:
Step 4 – You will then want to click on “Footer” which will expand.
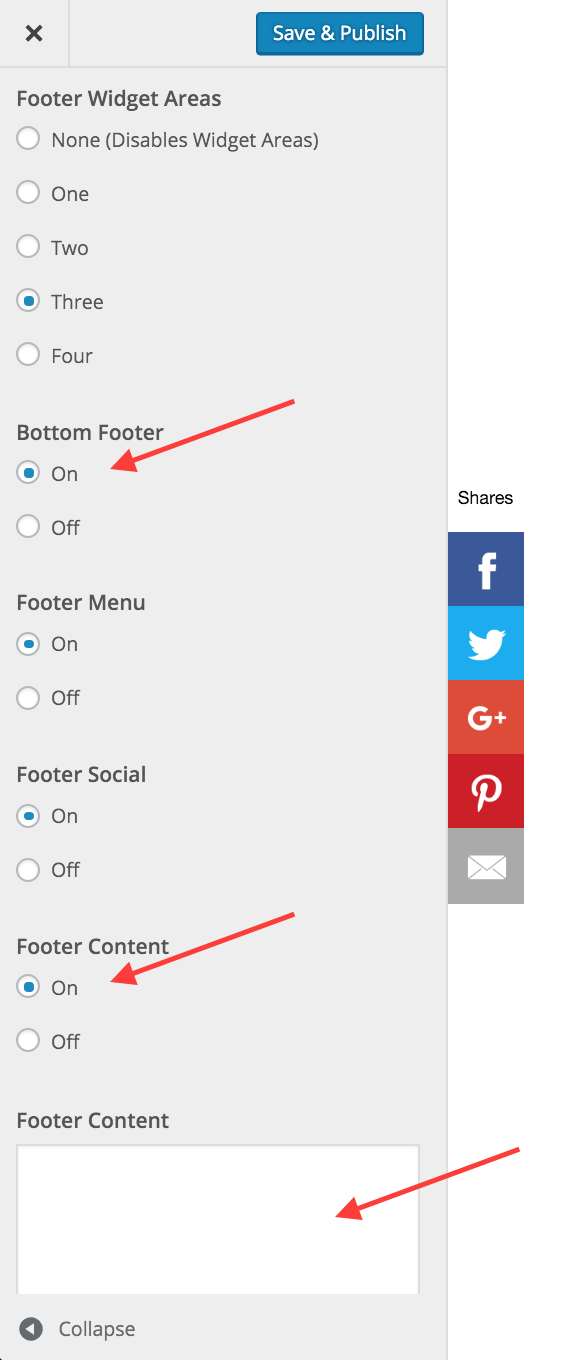
Step 5 – Scroll down and make sure the “Bottom Footer” and “Footer Content” toggles set to “ON.” Both of these must be set to on!
Step 6 – Copy and paste the code that was given to you by the RoverPass program manager. The code looks something like this:
<a href=”https://www.roverpass.com“>
<img src=”https://s3-us-west-2.amazonaws.com/cdn.roverpass.com/marketing-photos/north-carolina-1.png.gif”>
</a>
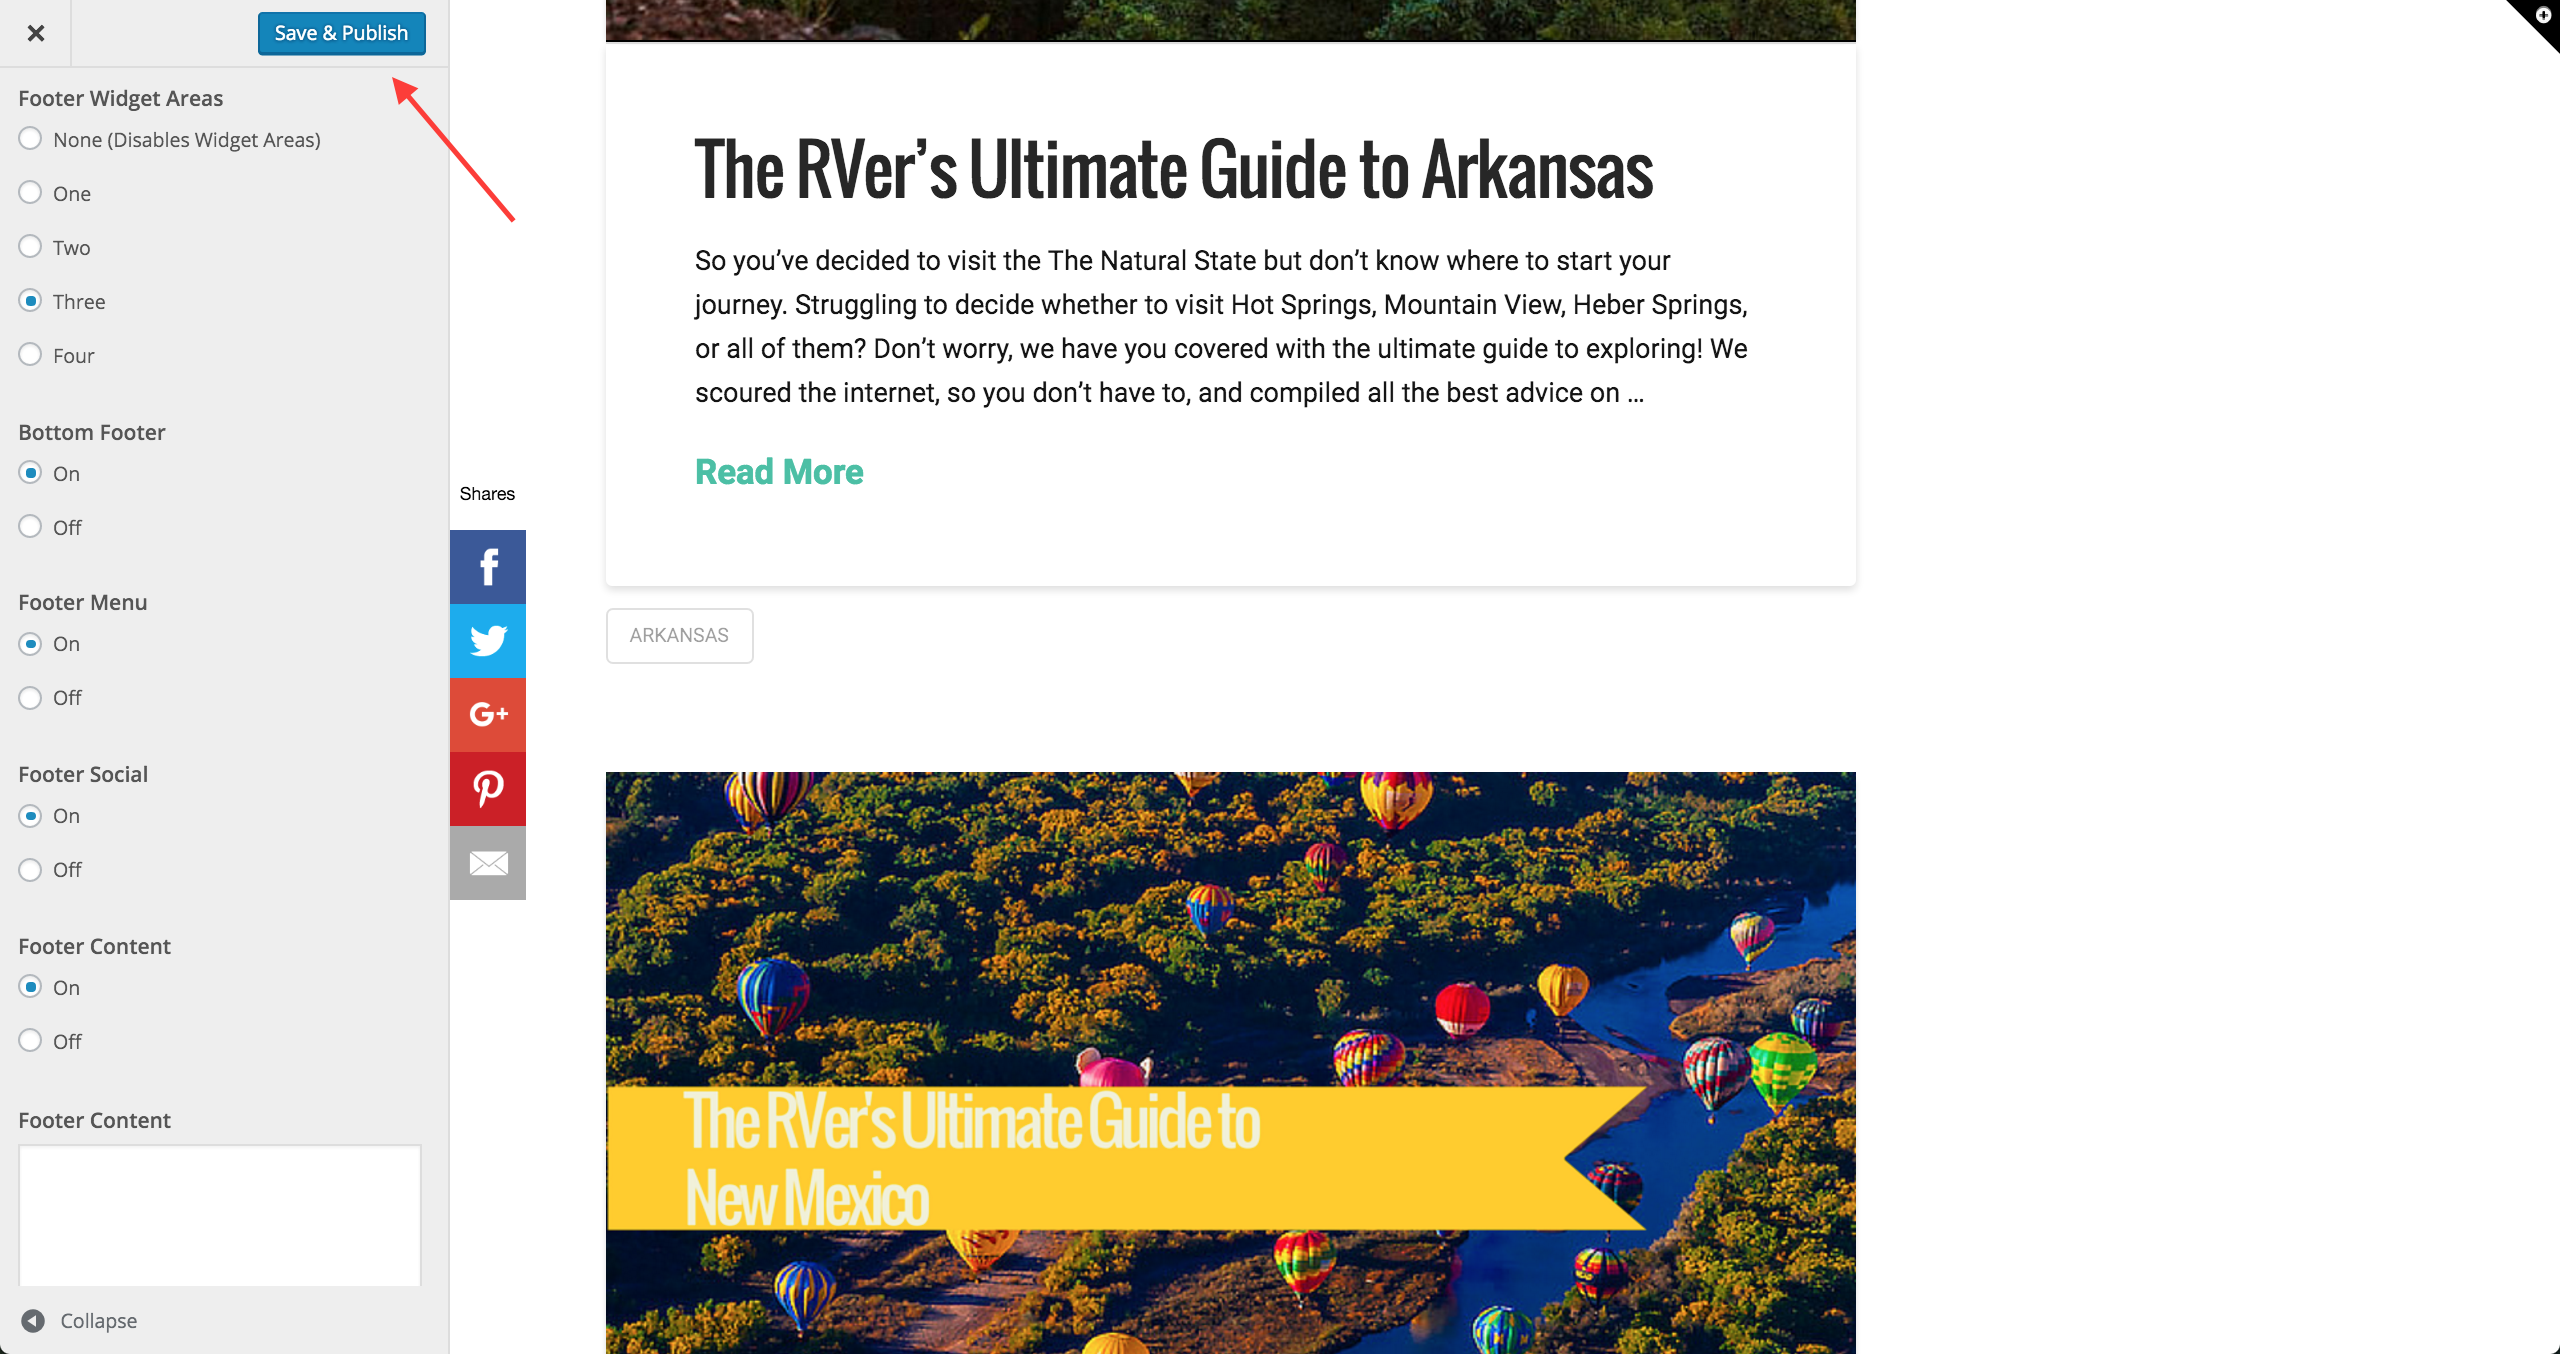
Step 7 – Click save on the top left side of the screen
You’re Finished!
—
You can always email hello@roverpass.com if you lost it or need it or need the code again.
For non-wordpress sites and custom websites:
We can try to help you figure it out. Let’s jump on a phone call and come up with a solution. If you website was built by an agency, we recommend getting in contact with them. They will know exactly what to do to get this on your site and usually do it free of charge.

